Using Three.js with Vue3 + TS


Using Three.js with Vue3 + TS
Three.js with Vite + Vue + Typescript Tutorial
Prerequisites
You already know a little bit of Vue3.
About the Errors
After reading this you will be able to create beautiful interactive three.js scenes inside your Vue3 web applications.
I am new to write ups, if I miss something please do tell me so I can improve and people do not leave mid way because something did not work out. Finally, thanks to twitch.com/ladyofcode for inspiring their viewers to write documentations.
Starting the Project
npm create vite@latest
For the purpose of this tutorial let’s name the project as VueThreeProject.
PS F:\Temp\purge> npm create vite@latest
? Project name: » VueThreeProject
Press enter to set the default package name.
PS F:\Temp\purge> npm create vite@latest
√ Project name: ... VueThreeProject
? Package name: » vuethreeproject
Use arrows to select Vue.
? Select a framework: » - Use arrow-keys. Return to submit.
    Vanilla
>   Vue
    React
    Preact
    Lit
    Svelte
    Others
Select Typescript from variant or customize your Vue install you can add routers and other useful packages.
PS F:\Temp\purge> npm create vite@latest
√ Project name: ... VueThreeProject
√ Package name: ... vuethreeproject
√ Select a framework: » Vue
? Select a variant: » - Use arrow-keys. Return to submit.
    JavaScript
>   TypeScript
    Customize with create-vue ↗
    Nuxt ↗
Final Output
PS F:\Temp\purge> npm create vite@latest
√ Project name: ... VueThreeProject
√ Package name: ... vuethreeproject
√ Select a framework: » Vue
√ Select a variant: » TypeScript

Scaffolding project in F:\Temp\purge\VueThreeProject...

Done. Now run:

  cd VueThreeProject
  npm install
  npm run dev
Now the terminal will be serving a website on http://127.0.0.1:5173/. Start another terminal and run the following command. This tutorial would not require using sass but it is important for component wise styling. You can skip this step if you want.
Installing Sass
npm i sass
Once the project is created, cd into the project and run npm install.
Setting Up Three.js
npm i three
Creating a Three.js Component
Create a sub directory named ThreeScene inside src/components in the project root.
Create the following files in ThreeScene directory.
ThreeScene.vue
ThreeScene.ts
SceneBuilder.ts
ThreeScene.scss
Use these command to achieve the actions listed above
mkdir -p src\components\ThreeScene
type nul > src\components\ThreeScene\ThreeScene.vue
type nul > src\components\ThreeScene\ThreeScene.ts
type nul > src\components\ThreeScene\SceneBuilder.ts
type nul > src\components\ThreeScene\ThreeScene.scss
Now open the corresponding files and add the following code to it.
ThreeScene.vue
This is a Vue3 single-file component that contains a single div with an id of three-sketch which is used as a reference for the ThreeScene.ts script. The script is written in TypeScript and contains the logic for creating a Three.js scene inside the three-sketch div.
The component also includes a Sass file that imports styles from the ThreeScene.scss file, which can be used to customize the appearance of the Three.js scene.
In short, this component is a simple wrapper that allows for the integration of a Three.js scene within a Vue3 application.
<template>
    <div class="sketch-container">
        <div id="three-sketch" ref="sketch" style="overflow:hidden;"></div>
    </div>

</template>

<style lang="scss">
@import "./ThreeScene.scss"
</style>
<script lang="ts" src="./ThreeScene.ts"></script>
ThreeScene.ts
import {defineComponent, onMounted } from "vue";
import { toRaw } from "vue";

import SceneBuilder from './SceneBuilder';

export default defineComponent({
    name:"ThreeScene",
    props:{
    },
    components:{
    },
    setup(){
        return {
        }
    },
    data(){
        return{
           sketch:null,
           description:null,
           width: 540,
           rendered:false,
        }
    },
    methods:{
        redirectToDetailed(){
        },
        updateWindowWidth() {
                this.scene.camera.aspect = window.innerWidth / window.innerHeight;
            this.scene.camera.updateProjectionMatrix();
            this.scene.renderer.setSize( window.innerWidth, window.innerHeight );
            this.updateWindowWidth()
          }
    },
    mounted(){
        this.scene = new SceneBuilder(this.$refs.sketch)
        this.scene.render()
        window.addEventListener('resize', this.updateWindowWidth);
        this.rendered = true;
    },
    beforeDestroy() {
        window.removeEventListener('resize', this.updateWindowWidth);
      },
    computed:{

    }
  }
);
SceneBuilder.ts
import * as THREE from 'three';

import { OrbitControls } from 'three/examples/jsm/controls/OrbitControls.js';
import { toRaw } from 'vue';

export default class SceneBuilder{
    root: HTMLElement
    scene: THREE.Scene
    camera: THREE.PerspectiveCamera
    renderer: THREE.WebGLRenderer
    controls: OrbitControls
    material: THREE.MeshNormalMaterial
    directionalLight

    constructor(root: HTMLElement){
        this.root = root;
        this.scene = new THREE.Scene(),

        this.renderer = new THREE.WebGLRenderer({ antialias: true });

        this.renderer.setSize( 540, 640 );
        this.renderer.setPixelRatio(window.devicePixelRatio)
        this.scene.background = new THREE.Color( 0x5555555);
        this.cameraSetup();

        this.controls = new OrbitControls( this.camera, this.renderer.domElement );
        this.draw()
        this.root.appendChild( this.renderer.domElement );
    }

    cameraSetup (){

        this.camera = new THREE.PerspectiveCamera( 75, window.innerWidth / window.innerHeight, 0.1, 1000 );

        this.camera.position.set( -20, 10, 20 );
        this.camera.lookAt(0,0,0)
    }

    draw () {
        // LINE

        this.material = new THREE.LineBasicMaterial( { color: 0xffffff } );


        // GRID
        const gridHelper = new THREE.GridHelper( 500, 50 );
        this.scene.add( gridHelper );

        //AXES
        const axesHelper = new THREE.AxesHelper( 5 );
        this.scene.add( axesHelper );

        //LIGHTS
        var light = new THREE.Light(  0xFFFFFF, 10, 100 );
        light.position.set( 10, 10, 10 );
        this.scene.add( light );

        this.light = new THREE.AmbientLight( 0xaaaaaa)
        this.scene.add( this.light );


        //threejs create box
        let box = new THREE.BoxGeometry( 1, 1, 1 );
        let material = new THREE.MeshBasicMaterial( { color: 0x00ff00 } );
        let cube = new THREE.Mesh( box, material );
        cube.position.set(0, -6, -6)
        this.scene.add( cube );
}

    render = () => {
        requestAnimationFrame( this.render );
        this.renderer.render(toRaw(this.scene), this.camera)
        this.controls.update();


    }

}
Now to see this component directly we can import it in main.js and see the view.
main.js
import { createApp } from 'vue'
import './style.css'
import App from './App.vue'

import ThreeScene from './components/ThreeScene/ThreeScene.vue'

createApp(ThreeScene).mount('#app')
Open browser at http://127.0.0.1:5173/ and see the result
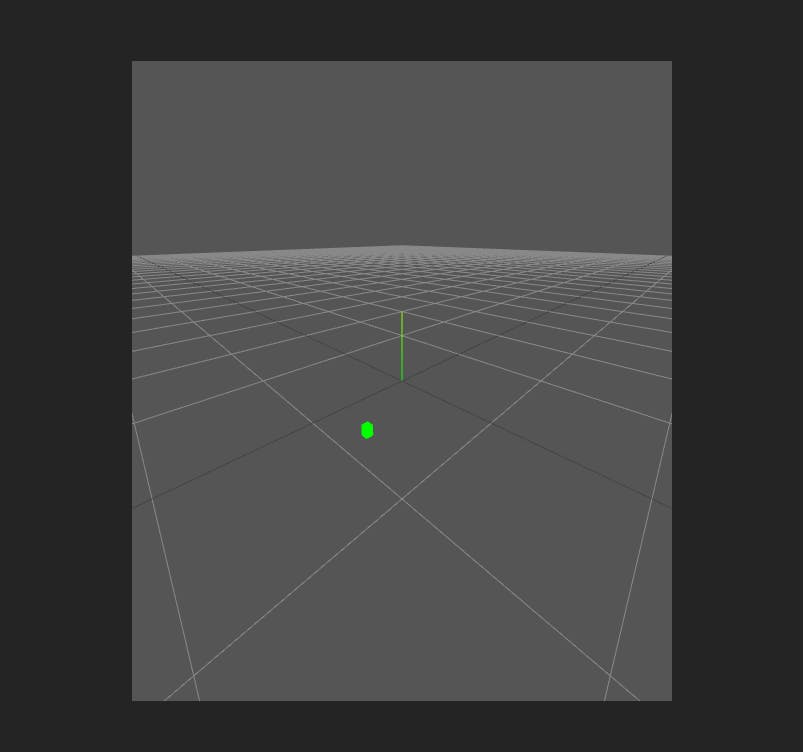

A Three.js scene in Vue3 rendered using Vite+Vue+TypeScript Project
Usage in .vue
To use it inside other components import the ThreeScene.vue inside the script part and use it as the following <ThreeScene/>.
Git Repository
You can also use the above starter template from github
git clone https://github.com/QuantumNovice/vue3-threejs-typescript-starter-template
cd vue3-threejs-typescript-starter-template
npm i
npm run dev
Concluding Remarks
In conclusion, I hope this tutorial about using Three.js with Vue3 and TypeScript has been informative and helpful. By combining these powerful libraries, you can create stunning 3D graphics and interactive experiences on the web.
As you continue to explore the possibilities of Three.js, Vue 3, and TypeScript, don't be afraid to experiment and push the boundaries of what's possible. The web development landscape is constantly evolving, and there is no limit on your imagination.
Remember to always keep learning, stay curious, and have fun along the way. Thank you for reading, and happy coding!